Best Monitor Settings for Gaming
If you want to take maximum advantage of a new monitor, you should calibrate it to create an optimal picture for games or other applications. We will help you with the monitor settings for the best gaming experience.
Why should I calibrate the monitor?
Almost all monitors show the wrong colors. This can become problematic not only when editing images. Regular monitor calibration is an absolute must for anyone who often edits images.
However, it is also beneficial for all other users. Only when the screen is properly calibrated can it really display colors correctly. Often, a screen that appears to be very poor suddenly offers a really good picture. Photos, for example, are nowadays almost only taken digitally and then transferred to the computer. If an LED monitor is used, it is quite possible that the colors look completely different.
This is because the monitor and the camera do not use the same color space. Thus, calibration can ensure that the user experience improves significantly. This is true not only for image editing, but also for gamers. After calibration, everything on the screen can be seen in the colors as they are in reality.
How should I adjust the monitor as a gamer?
To enjoy great games properly, the monitor setting is very important. Especially contrast, colors and brightness must always be adjusted optimally. There is not necessarily one setting that suits everyone, as ambient brightness and individual preferences also play a major role. Many monitors already have the maximum brightness set at delivery. But not every gamer plays at night; in daylight, this brightness is not necessary at all. Moreover, this very high brightness on the monitor can strain the eyes during prolonged gaming.
Six steps to adjust your Monitor Settings for Gaming
As a gamer, you should also think about the calibration of your monitor. We will show you how to adjust your monitor settings for gaming in six steps.
Step 1: Reset the monitor to factory settings
In the first step, deactivate all image optimization and power saving functions. These can influence the color representation and thus falsify the result during a calibration. The quickest way to reset the device is to reset it to the factory settings. The switch required for this is usually found under a menu item like Setup or System. However, it still doesn’t hurt to look through the menu afterwards, because some monitors have image optimization functions active at the factory and have to be turned off before calibration.
Step 2: Determine ideal values for brightness and contrast
You can adjust the brightness and contrast directly on the monitor. As a rule of thumb, the brightness should not be set too high, otherwise the eyes will be unnecessarily strained. You can extend the battery life on a notebook with moderate brightness settings. The right contrast is important, because too much contrast strains the eyes, and too little contrast strains the eyes as well. The best way to adjust the contrast is to use a grayscale test image. Windows has a handy tool for that: Start Menu → Settings → Display → Windows HD Color Settings

First adjust the contrast and then the brightness so that the color space goes evenly from white to black and not just from light gray to dark gray.
Important: Since the room lighting influences the perceived white and black levels, make sure there is sufficient ambient light when adjusting.
Readjust: Once you have optimally adjusted the brightness and contrast of your monitor, no further changes to the contrast are necessary. However, you should turn the brightness up or down as needed to match the ambient light in order to protect your eyes.
Step 3: Optimal color temperature for natural image impression
The color temperature determines the color impression the screen display makes on the viewer. In contrast to the normal temperature, which is measured in degrees Celsius, the color temperature is measured in Kelvin (abbreviated K). A value of 6500 K is considered ideal because this achieves a neutral display that is most similar to daylight white.
Unlike temperature, a higher color temperature, i.e. a value greater than 6500 K, does not correspond to a “warmer” display; on the contrary, the display appears cooler because the color spectrum appears shifted into the blue. If the color temperature falls below 6500 K, however, the image then looks subjectively warmer because the red color components of the image now predominate.
To check whether your monitor uses the correct color temperature, look for a menu item like Colors in the on-screen menu. There you should also be able to adjust the color temperature, ideally to 6500 K as described above. Exactly this value is often also available for selection in the screen menus.
However, some monitors don’t allow you to select any numerical values, but only parameters like warm, warmer or cool, colder or bluish. In this case, look for a setting like neutral or standard – this should bring you closest to the target value of 6500 K.
Step 4: Adjust gamma correction for optimal grayscale display
If the goal is to achieve the most balanced color representation possible, the gamma value also plays an important role. The gamma value is a correction factor for the monitor’s grayscale levels and ensures that these are finely graded and thus displayed naturally. For displays, the gamma value should be 2.2 and can also be adjusted directly via the monitor’s on-screen menu in better monitors.
You can calibrate your settings with the Windows tool Windows HD Color Settings. Under Display calibration, select the Calibrate display option. The Windows Display Color Calibration tool will then appear and guide you through the process of adjusting gamma, brightness, contrast, and color balance.
Tip: If you can set the color temperature and gamma value on your monitor, but both options are grayed out, this may be due to the active picture mode. In that case, try switching to a custom mode. In predefined picture modes such as Movie, Office or Game, many devices do not allow you to adjust the color temperature and gamma value.
Step 5: Save screen settings to a color profile
Windows provides you with dccw, a practical tool with which you can check your screen settings once again using test images and then save them in a color profile. This is supported by all programs that have an integrated color management. In addition to Windows itself, this includes most image editing programs such as Adobe Photoshop, but also browsers such as Mozilla Firefox and Google Chrome.
You start the Windows tool by typing dccw in the search window. Before doing so, you should check whether the graphics card driver has set its own parameters for color reproduction. So that the calibration is not distorted by these settings, you should deactivate them or reset the driver to its default values.
dccw guides you through the calibration step by step using test images for gamma correction, brightness, contrast and color temperature. Afterwards, save the calibration settings with Finish. If desired, the ClearType wizard is started to improve the readability of text.
Step 6: Windows 10 Creators Update: Night mode is easy on the eyes
Since the Creators Update, Windows 10 has a blue light filter that automatically turns on and off if desired. In this ergonomic display mode, the OS reduces the blue light components of the image and thus prevents eye fatigue.
How to activate the night mode: Call up the Windows settings with Windows + I and click on System. Then, in the Color section, select Night Mode settings. Under Schedule Night Mode, click On to activate night mode. Depending on the time of day, the color display on the screen will now change. Alternatively, you can define a time window in which night mode is to be active.
Tip: If the position services are activated, the night mode can switch on automatically at sunset. Until the next sunrise, the colors displayed on the monitor then appear warmer because the color temperature and thus the blue tones are reduced.
Adjust your Monitor Settings with a Colorimeter
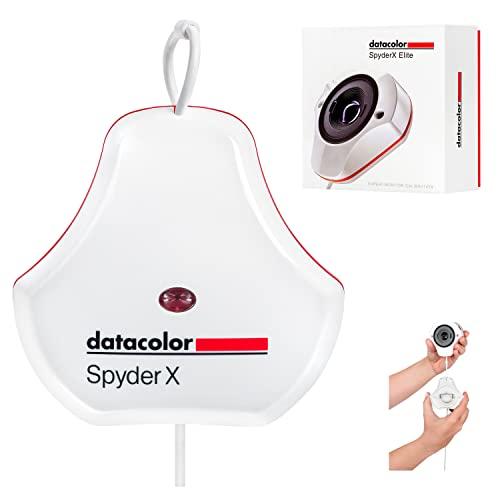
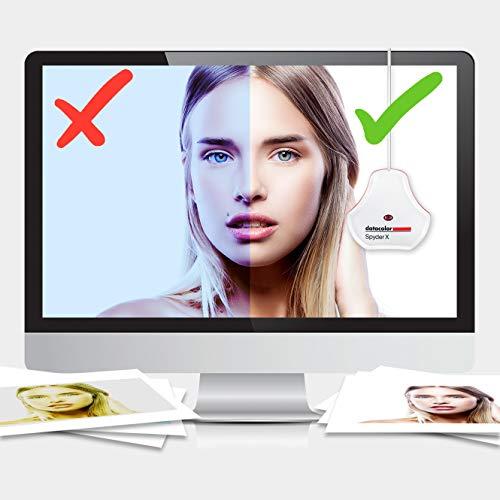
Adjusting colors on the screen without a colorimeter is always subjective, since everyone’s color perception is different. For a truly true-color display, it is better to perform the calibration with a colorimeter. There are various devices that work absolutely fully automatically and perform the calibration very quickly and precisely by themselves.
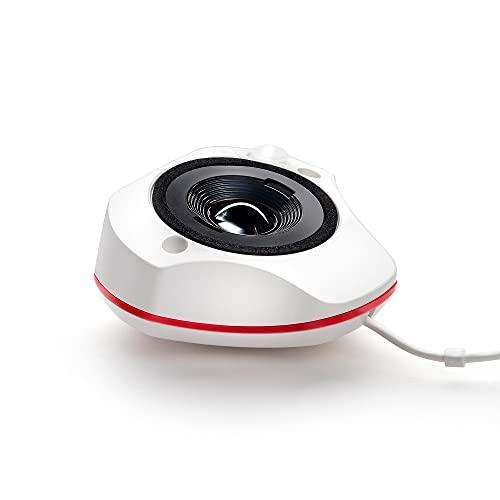
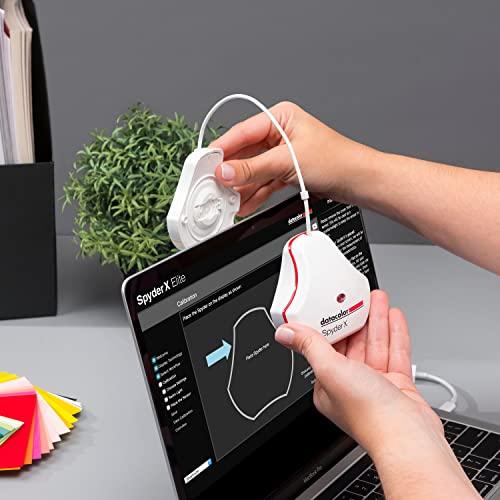
Such a colorimeter has a measuring sensor and profiling software. The sensor is first connected to the USB port of the PC. Then it is placed directly on the monitor screen. It measures the colors and the gray values that the display shows. Then these values are transmitted to the software. This software compares the measured values with the ideal values. From this comparison, it creates a color profile.
This type of calibration is rather something for professionals, for example photographers or graphic designers. Nevertheless, there are already quite inexpensive colorimeters, so that anyone who does not work professionally with his computer, but still attaches importance to a true-color display, can calibrate his monitor optimally.
- Calibrating your monitor to achieve color precision now takes just a minute or two - several times faster than previous models
- Groundbreaking lens-based color engine provides a higher level of color accuracy for multiple monitors (including StudioMatch Assistant to match displays) and projectors. SpyderX Elite features room-light monitoring, automatic profile changing and significantly more precise screen color, shadow detail and white balance
- SpyderX Elite is intuitive, you don't have to be a color expert. It features a step-by-step assistant and expert console, with an all-in-one calibration control panel and unlimited calibration setting choices including TV and video standards
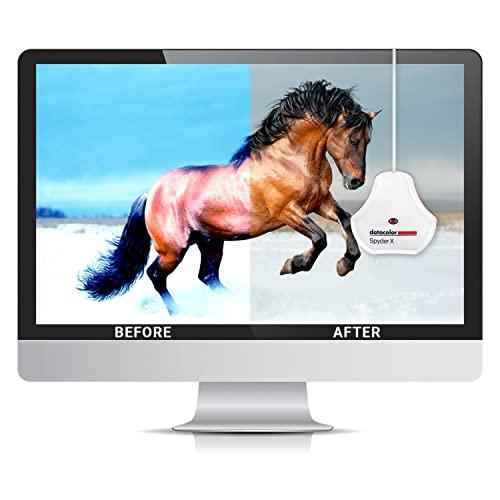
- SEE THE DIFFERENCE INSTANTLY: SpyderProof functionality provides before-and-after evaluation of your display with full-screen images including your own
Managing color profiles in Windows
A color profile is a file that describes the color properties of the monitor. Based on the information stored in it, Windows and other applications recognize into which screen colors, for example, the red, green and blue colors of a photo must be converted so that it is displayed in true colors.
Windows automatically assigns a color profile to each connected monitor. This profile is device-independent and uses the sRGB color space commonly used by consumer end devices. It can be used by all programs with integrated color management, including Windows itself.
- You can recognize a color profile by its ending ICM, which stands for Image Color Management. Outside the Microsoft world, color profiles are often also called ICC profiles (International Color Consortium). Apart from that, however, there is no difference in content. Windows saves a calibration performed with the Windows tool dccw as a new color profile, links it to the monitor and sets it as the new default profile. In Windows, you can switch between different profiles to find out the best display for you.
- The quickest way to get to color management is to enter the term in the search box. Then use Add and Browse to tell Windows where to save the new profile. This can come from a software CD that comes with the monitor, for example, or from the manufacturer’s website and be located in the download directory. Once you have made your selection, click Add to install the color profile on the system.
- You can remove a profile by clicking on the corresponding Remove or Set as default profile button. If you are using several monitors, you can assign a color profile to each of them. To do this, switch to the respective monitor via Device. For better orientation, a click on Identify monitor displays the number assigned to each display.
FAQs for Monitor Settings for Gaming
What does calibration mean?
Calibration is usually understood to mean the precise adjustment of equipment or software. Often a measuring device is used for this purpose, which is set up to an initial value. A measurement is performed so that the deviation to the correct value can be detected. Afterwards, the device is readjusted. The aim is to bring the values back into the tolerance range. A calibration ensures that the device is set to standard values, at the same time it also makes processes more accurate.
How often should I adjust the settings of my monitor?
In general, calibration is always a good idea when you move your setup to a different location. The lighting conditions play a big role in the settings. Laptop screens are probably even more affected if you use them for mobile work or gaming. If you have a standalone computer that doesn’t leave its place, a calibration is worthwhile every 4 to 6 months. If you buy a new monitor, you should always calibrate it when you start it for the first time.
Is the game mode worth it?
Many monitors advertise with a so-called game mode. But, which monitor settings are activated by this? Is this automatic adjustment worthwhile for gaming?
Basically, the game mode reduces the input lag of your monitor, which can give you a minimal advantage when gaming. The video signal is sent to the screen faster, which is especially useful in multiplayer games.
Unfortunately, the game mode usually has a negative impact on the image quality of your monitor.
Are there programs for screen calibration?
There are some tools that can be used for screen calibration, for example the already mentioned tool dccw. However, it is always the case that these tools do not perform the calibration automatically. They usually provide test images, the viewer has to decide which setting is close to the desired image. Accordingly, none of these tools works without the human eye. Accordingly, the result is not objective, but subjective, and also far from the optimal color representation.
How do I install a driver for my monitor?
Normally, Windows automatically detects the display connected to the graphics card using Plug & Play and selects the screen resolution, refresh rate and color settings accordingly. However, automatic detection does not always work with some models, especially UHD monitors. If the monitor has special features, such as automatic rotation (pivot) or a webcam, you may need additional software in addition to the monitor driver. You can solve both problems by installing the driver package for your monitor – either via the enclosed CD or via a download from the respective manufacturer’s website. You can install drivers without their own setup routine in the device manager under Displays by double-clicking on the name of the monitor, then bringing the Drivers tab to the front and next clicking on Update driver. After that, select Search for driver software on the computer.
